Pre-Trip Essentials: What to Check Before Hitting the Road
What should I check on my RV before a road trip? This is probably the most important question any RV owner can ask, and the answer could literally save your vacation. Your RV pre-trip maintenance checklist should become as automatic as buckling your seatbelt - do it every single time, no exceptions. Here's a sobering statistic: according to RV industry data, nearly 60% of roadside breakdowns could have been prevented with a thorough pre-trip inspection.
Start with the obvious stuff that'll keep you safe on the highway. Walk around your entire RV and check all tires for proper inflation, wear, and any concerning bulges or cracks. RV tires should typically be inflated to 80-110 PSI depending on your model, and checking when they're cold gives you the most accurate reading. Don't forget that spare tire - it's the one everyone overlooks until they desperately need it.
Check all exterior lights: brake lights, turn signals, running lights, and that annoying backup beeper. Have someone help you test them while you're at the controls. I learned this lesson the hard way when a state trooper pulled me over in Nevada because my left turn signal was out. Turns out, it had been dead for who knows how long. Next, peek under the RV for any signs of leaks - fresh water, gray water, black water, oil, or coolant. A small puddle now could mean a big problem down the road. One fellow RVer shared how ignoring a small fluid spot cost them $2,800 in transmission repairs just three weeks later.
Inside your rig, make sure all cabinet doors and drawers are latched securely. Nobody wants their dishes playing Frisbee at 65 mph, right? Test your propane system for leaks using soapy water on connections - bubbles mean trouble, and a propane leak can lead to fire hazards or explosions. Fire up your generator if you have one, and verify that both your house batteries and chassis battery are fully charged. A fully charged 12-volt battery should read between 12.6 and 12.8 volts on your voltmeter.
Run through your slide-outs if equipped, checking for smooth operation and proper sealing. One common issue is dirt and debris accumulating in the slide mechanism, which causes extra strain on the motors and can lead to failures that cost $1,500 or more to repair. Finally, do a quick inventory of your safety equipment: fire extinguisher (check that it's still in the green zone on the pressure gauge), smoke detector, carbon monoxide detector, and first aid kit.
This complete RV maintenance checklist before traveling might seem like overkill, but spend 30 minutes on these checks and you'll avoid 99% of roadside disasters. Plus, you'll sleep better knowing everything's working as it should. Many experienced RVers create a laminated checklist that they keep by the door and physically check off items before each departure. This simple habit has saved countless vacations from turning into expensive repair nightmares.
How Often Should You Really Be Doing RV Maintenance?
How often should I perform RV maintenance? The answer isn't as simple as "every 3,000 miles" like your car. RV maintenance follows a tiered schedule that depends on how much you use your rig and where you store it. Think of it in three categories: before every trip, monthly/seasonally, and annually. Here's the thing - the frequency matters because RV systems deteriorate both from use and from sitting idle. Your water pump seals can dry out even if you never turn it on.
Before every trip, you're doing those safety checks we just covered - tires, lights, leaks, and securing loose items. This is non-negotiable, whether you're going 20 miles or 2,000. Monthly maintenance kicks in if you're a regular user (at least once a month). This includes checking and topping off all fluid levels: engine oil, coolant, brake fluid, power steering fluid, and windshield washer fluid.
Run your generator for at least two hours under load to keep it happy. Generators that sit unused for months develop carburetor issues that cost $400-800 to fix. Exercise your slide-outs even if you're not traveling - they need to move to stay lubricated. Check your roof for any new damage or deteriorating sealant, and clean or replace your air conditioner filters. A dirty AC filter reduces efficiency by up to 15% and makes your air conditioner work harder, shortening its lifespan.
Your seasonal RV maintenance checklist gets more involved. Every three months, inspect your batteries' water levels (if not maintenance-free), clean terminals with a baking soda solution, and test the charging system. Batteries should charge to 13.2-14.4 volts when connected to shore power or running the engine. Check all window and door seals for cracks, as even tiny gaps let moisture in that leads to wood rot and mold.
Lubricate hinges, locks, and slide-out mechanisms with the manufacturer's recommended products - usually a silicone-based spray for seals and lithium grease for mechanical parts. Inspect your awning for tears, clean it thoroughly with mild soap (never harsh chemicals that degrade the fabric), and make sure the arms aren't bent. Drain and flush your water heater to remove sediment buildup that reduces heating efficiency and capacity, and sanitize your fresh water system if it's been sitting unused. The bleach-and-water sanitizing process takes about two hours but prevents bacterial growth.
Annual maintenance is your deep dive, and many RV owners schedule this during the off-season. This includes changing engine oil and filters (even if you haven't hit the mileage - oil degrades over time, typically after 12 months), servicing the generator (oil change, air filter, spark plugs), inspecting and servicing brakes, checking wheel bearings (they should be repacked every 12,000 miles or annually), and testing your LP gas system professionally. A certified technician should do this for about $75-150.
You'll also want to service your roof air conditioner (cleaning coils, checking coolant levels, testing the compressor), and have a professional inspect all roof sealants and make repairs. Professional roof inspections typically cost $150-300 but can identify problems that would cost thousands to repair if water damage spreads. If your RV sits in storage most of the year, you'll still need this annual checkup - maybe even more so than someone who uses their rig regularly, since systems that don't get exercised often fail when you finally need them.
The Beginner's Essential RV Maintenance Checklist
What are the most important RV maintenance tasks for beginners? If you're new to RV ownership, the sheer volume of maintenance can feel overwhelming. The RV maintenance checklist for beginners focuses on the tasks that have the biggest impact on safety, reliability, and preventing expensive repairs. Don't panic - focus on these essential systems first, and you'll build confidence as you go. Listen, many new RV owners report feeling intimidated by maintenance at first, but within six months, most develop a routine that takes less than an hour per month.
The Top 10 Must-Do Maintenance Tasks for RV Newbies:
Master your water systems: Learn to sanitize your fresh water tank every six months using a quarter-cup of bleach per 15 gallons of tank capacity. Flush your black tank properly - always use plenty of water and tank treatments. Experts recommend at least a gallon of water per flush. Never let your gray tank overflow. Install a clear sewer elbow adapter so you can see when your black tank is truly flushed clean. These skills prevent the most common rookie mistakes, like the dreaded "poop pyramid" that happens when you don't use enough water, potentially requiring professional tank cleaning that costs $200-400.
Keep your roof sealed: Your roof is your RV's first line of defense against the elements. Inspect sealants around vents, air conditioners, satellite dishes, and antenna mounts every few months. Look for cracks, gaps, or areas where the sealant has pulled away. A $5 tube of Dicor self-leveling sealant now prevents thousands in water damage later. Water intrusion is responsible for over 70% of serious RV structural damage, and once it starts, it spreads quickly through walls and floors. Take photos during your first inspection so you can compare and spot changes over time.
Maintain your tires religiously: Check pressure before every trip (when they're cold), inspect for uneven wear patterns that indicate alignment issues, and replace them every 5-7 years regardless of tread depth. The sidewalls deteriorate from UV exposure and ozone even if you barely drive. RV tire blowouts are dangerous and expensive, often causing collateral damage worth $1,000-3,000 to fenders, water lines, and electrical systems. Write the manufacture date on your tire checklist - the DOT code on the sidewall tells you the week and year of production (example: 2319 means the 23rd week of 2019).
Watch your battery health: Learn to test your house batteries with a simple voltmeter (they cost $10-20 at hardware stores), keep them charged when in storage using a trickle charger or solar panel, and understand when they need replacing. Typically, that's after 3-5 years for standard deep-cycle batteries, longer for AGM or lithium. Dead batteries are the #1 reason RVs won't start, and a full battery replacement for a typical Class A motorhome runs $400-800. Low battery charge also damages your 12-volt appliances and shortens their lifespan.
Clean and treat your awning: Dirt and mildew damage awning fabric fast, turning your nice shade into an embarrassing eyesore. Clean it regularly with mild soap and water using a soft brush - never pressure washers that can tear the fabric. Let it dry completely before retracting (even if it takes an extra 20 minutes), and never leave it out in storms. Winds above 20 mph can tear awnings right off the RV. Awning fabric replacement costs $300-800 depending on size, but proper care extends life to 10-15 years instead of 5-7.
Lubricate slide-outs: Use the manufacturer's recommended lubricant on slide mechanisms. Check your manual - some specify dry lubricants while others want silicone spray. Wipe away dirt and grime before retracting. Slide repairs are ridiculously expensive, often running $2,000-5,000 because the mechanisms are complex and labor-intensive. Watch for black streaks on your slide-out topper - this indicates the wiper seal is wearing and needs replacement before it fails completely.
Change your air filters: Both your engine air filter and your coach HVAC filters need regular replacement. Check engine filters every 12,000 miles or annually, and coach filters monthly during heavy use. Dirty filters kill efficiency by up to 25% and damage equipment by allowing dust and debris into sensitive components. The filters cost $5-25 each, while replacing a damaged HVAC blower motor costs $300-600.
Test your safety equipment monthly: Press the test buttons on your smoke and CO detectors. If they don't beep loudly, replace the batteries immediately. Check your fire extinguisher's pressure gauge - the needle should be in the green zone. If it's in the red, it needs recharging or replacement. These devices literally save lives, and smoke detectors should be replaced entirely every 10 years regardless of whether they still beep. A $25 detector is a bargain compared to losing your RV to fire.
Monitor your refrigerator: RV refrigerators are finicky absorption-style units that work differently than home refrigerators. Keep them level within 3-6 degrees (use a bubble level on the interior shelf), clean the burner annually to remove spider webs and debris that affect efficiency, and make sure the exterior vents are clear of obstructions. A dead fridge on a hot day ruins more than just your food - spoilage can cost $200-300, and RV refrigerator replacements run $1,200-2,500. Many RVers install small fans in the refrigerator vents to improve cooling efficiency in hot weather.
Document everything: Keep a maintenance log with dates, mileage, and what you did. Either use a dedicated notebook or try an app like RV Maintenance Log or My RV Checklist. This helps you spot patterns (like "my water pump runs louder every spring"), remember schedules (did I sanitize the water system this year?), and proves maintenance history if you sell. Well-documented maintenance can increase your RV's resale value by 10-15% because buyers know it's been properly cared for.
Start with this essential RV maintenance checklist, and add more advanced tasks as you get comfortable. There's no shame in hiring professionals for complex jobs - knowing what you can handle versus what needs expert help is itself an important skill. For example, many RVers handle fluid checks and filter changes themselves but hire professionals for brake service, roof resealing, and generator maintenance. The RV community is incredibly helpful, so don't hesitate to ask questions at campgrounds or in online forums. Fellow RVers love sharing their hard-won knowledge and will often walk you through tasks hands-on.
Finding and Working with a Reliable RV Repair Shop
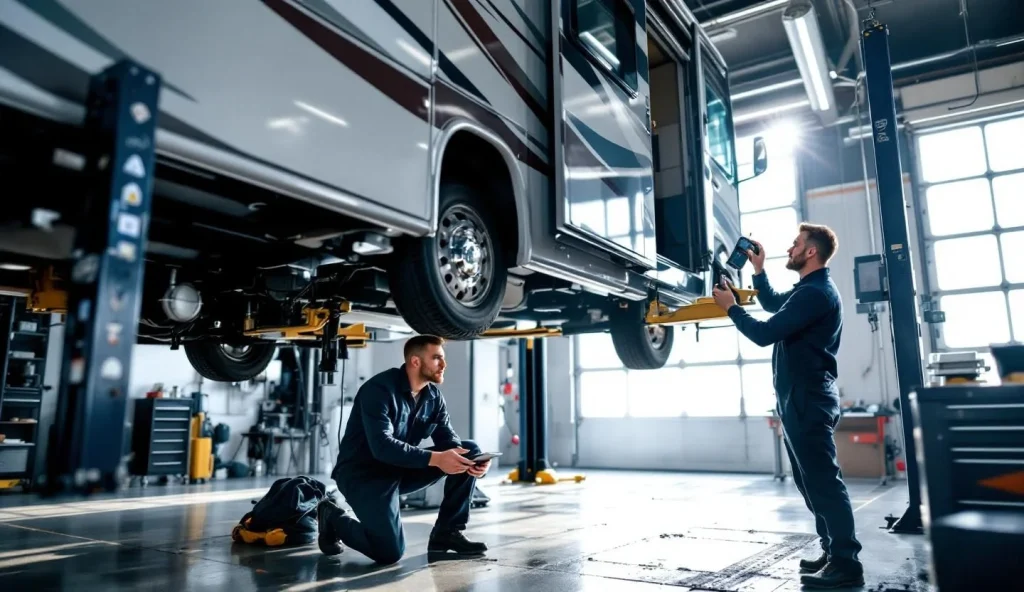
How do I find a reliable RV repair shop for maintenance work? Even the handiest RV owner eventually needs professional help, whether for annual inspections, warranty work, or repairs beyond their skill level. The trick is finding a shop you can trust before you desperately need one. RV repair shops vary wildly in quality, pricing, and expertise - some specialize in certain brands or types of systems, while others are generalists who handle everything from chassis to appliances.
Start your search by asking fellow RV owners for recommendations. The campground gossip network is surprisingly reliable. People love sharing both horror stories and praise for RV service centers, and you'll quickly learn which shops have solid reputations in your area. Look for verified review platforms where you can filter by your location and see what real customers experienced. Pay attention to patterns in reviews: one bad experience could be a fluke, but multiple complaints about the same issue (slow service, surprise charges, poor communication, shoddy work that needs redoing) are red flags waving frantically. Notice how shops respond to negative reviews - do they make excuses, or do they genuinely try to make things right?
Once you've identified a few candidates, call them up and ask questions before showing up with your RV. How long have they been in business? What brands do they specialize in - this matters because Winnebago systems differ from Fleetwood or Airstream configurations. Are their technicians RVIA-certified? (Recreational Vehicle Industry Association certification indicates proper training.) What's their typical turnaround time for routine maintenance versus emergency repairs? Some popular shops are booked 4-6 weeks out. Can they handle warranty work if your RV is still covered, and are they authorized service centers for your RV's major component manufacturers? What's their shop rate? RV technician labor typically runs $85-150 per hour depending on location and expertise.
A good shop will answer these questions patiently and professionally, treating your inquiry as the beginning of a potential long-term relationship. If someone acts annoyed that you're asking basic questions or pressures you to schedule immediately without providing information, that tells you everything you need to know about how they'll treat you as a customer.
A trustworthy shop will walk you through the issues they find, show you the problems when possible (photos are standard practice now), provide written estimates before doing additional work, and never pressure you into unnecessary repairs that can "wait until next year." Watch how they treat your RV - do they cover seats and floors to avoid damage, or do you find greasy footprints and scratches?
Build a relationship with your chosen shop by bringing them your RV for regular maintenance even when nothing's broken. Technicians remember customers who treat them well, respect their expertise, pay promptly, and show appreciation for good work. These customers often get better service, more honest advice about which repairs are urgent versus optional, and priority scheduling when emergencies arise. Keep records of all work they do - photos, receipts, detailed invoices - in your RV's maintenance log. This documentation protects you if disputes arise and increases your RV's resale value by proving proper care.
Common RV Maintenance Mistakes (And How to Avoid Them)
Even experienced RV owners make maintenance mistakes that cost them time, money, and vacation days. Let's talk about the most common screw-ups so you can dodge these bullets.
Mistake #1: Ignoring small problems. That tiny leak around your window? That weird noise from the wheel well? That slide that's moving slightly slower than usual? These small issues become big disasters if ignored. Address problems immediately or at least get them professionally assessed. What costs $50 to fix today might cost $5,000 next month after water damage spreads or a bearing seizes.
Mistake #2: Over-winterizing or under-winterizing. If you live where temperatures drop below freezing, your winterization game needs to be perfect. Too little antifreeze in your lines, and you'll crack your plumbing system. But dumping antifreeze everywhere unnecessarily wastes money and creates a mess. Follow your RV's specific winterization procedure, or pay a professional to do it right.
Mistake #3: Using the wrong products. Not all RV toilets use the same chemicals. Not all roof materials accept the same sealants. Using automotive products on RV systems can void warranties or cause damage. Always check your owner's manual for approved products, or ask at an RV-specific parts store.
Mistake #4: Skipping the owner's manual. Speaking of manuals, actually read yours. Every RV has quirks, and manufacturers include specific maintenance schedules for a reason. That binder gathering dust in your cabinet contains the exact information you need about your specific systems, capacities, and maintenance intervals.
Mistake #5: Doing maintenance right before a trip. Murphy's Law loves RVs. If you're going to discover that your repair didn't work or you need an extra part, it'll be the morning you planned to leave. Do maintenance and repairs at least a few days before departure so you have time to fix any issues.
Mistake #6: Neglecting storage maintenance. Your RV needs care even when parked. Batteries discharge, tires develop flat spots, seals dry out, and critters move in. Visit your stored RV monthly to run systems, check for problems, and show rodents they're not welcome.
Your Monthly RV Maintenance Action Plan
Now that you understand the what, when, and why of RV maintenance, let's create your personal action plan. Print out a monthly RV maintenance checklist and keep it in your RV - make this routine as automatic as checking your mirrors before driving.
Your printable RV maintenance checklist should live in a binder with your owner's manuals, warranty information, and service records. Digital is fine too, but having a physical backup in your RV means you can reference it anywhere, even without cell service. Include checkboxes for each task and space to write dates and notes.
Set phone reminders for time-based maintenance that's easy to forget: "Check roof sealants" every three months, "Service generator" annually, "Replace smoke detector batteries" twice a year. These digital nudges catch the tasks that don't happen before trips but are equally important.
Join your RV's owner forum or Facebook group. These communities share maintenance tips specific to your make and model, warn about common problems, and offer moral support when things go wrong. Plus, seeing others' maintenance successes motivates you to keep up with yours.
Remember, consistent maintenance isn't about being perfect - it's about being purposeful. Some months you'll nail every item on your checklist. Other times, life happens and you'll do the bare minimum to stay safe. That's okay. What matters is developing the habit of regular attention to your RV's needs, learning more with each season, and catching problems before they become catastrophes.
Your RV is a complex machine, but it's also your ticket to adventure. Treat it well, and it'll reward you with years of reliable service and countless memories on the road. Keep this essential RV maintenance checklist handy, stay curious about how your systems work, and don't be afraid to ask for help when you need it. The investment you make in regular maintenance pays dividends in fewer breakdowns, lower repair costs, and that priceless peace of mind knowing your home on wheels is ready for whatever adventure comes next. Safe travels!
Need Professional RV Service?
Find verified RV repair shops in your area with real customer reviews.